The season of autumn isn’t only about autumn leaves, cozy sweaters and stylish boots. As the temperature drops and the leaves begin to change from yellow to green , your nails need an extravagant makeover that reflects the chillier weather. So, this fall let your personality and mood with the latest nail arts designs that are extremely easy to create and require only the smallest number of tools!
If you’re looking for simple, minimalist or even a touch of iridescent light We’ve got it covered.
Alter the way you normally apply nail polish and be inspired by these bloggers and YouTubers for Fall nail design ideas.
1) Ruffian Nails
You’ll need:
Metallic nail polish is the base color.
Dark autumnal nail polish is the best shade.
Top coat
Instructions:
Apply nail polish with metallic glitter on your nail bed and all across your fingers. Dry it completely.
Begin painting your nails with dark fall-inspired nail varnish, but just a tiny bit higher than your cuticles to create the form of an “U”. (Tips to make it more simple if you started with the middle of your cuticle, then gradually trace the line in the shape of a half circle.)
Once you’ve painted each of your nails, top it by applying a layer of top coat. That’s it!
2.) Bejeweled Nails
You’ll need the following:
Fallal hues nail polish
Top coat
Nail art rhinestones
Nail art Tweezer
Instructions:
Apply autumnal nail polish.
After you’ve applied it, while it’s still damp apply the nail art tweezer apply the rhinestones to the tips of the nails.
Apply an extremely thick top coat to protect the edges and keep the rhinestones from falling out. You’re done!
3.) French Tip Chrome Nails
You’ll need:
Base colour nail polish
Eyeshadow applicator
Chrome pigment powder
Top Coat
Cotton pad
The rub of alcohol
Instructions:
The nail bed should be prepared with an ointment of dark nail polish that you like.
When your nail polish is fully dried Use an eyeshadow application tool to apply chrome-colored pigment onto your nail’s tips exactly as you normally apply french nails.
Then, grab your top coat and begin painting the french tip in order to protect the chrome powder.
After sealing the chrome french tip clean off any excess chrome pigment with rub alcohol.
Then, apply another coat of top coat over your nails. Voila!
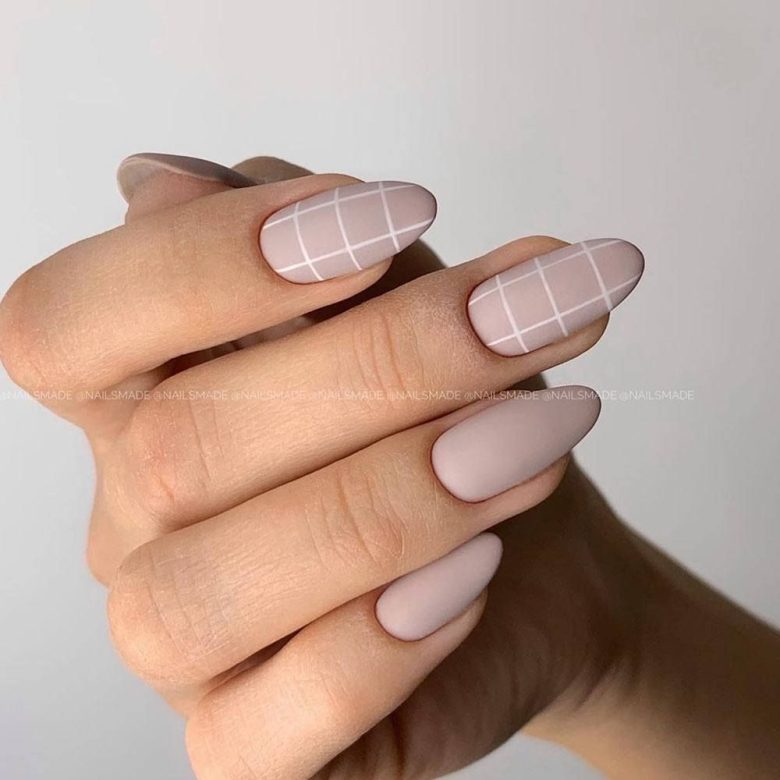
4) Plaid-esque Nails
What you’ll require:
Beige nail polish
Fine black and white brush nail polish
Base coat and top coat
Instructions:
Apply a single layer of base coat prior to applying nail polish on your nails.
After the base coat has been completely dry you can paint your nails using the beige color nail polish.
Next, using a white fine nail polish to draw a straight Vertical line about 1/4 of the way to the left.
Create a second horizontal line with the black fine nail polish about 1/3 of the way from the top.
Return to the vertical line you’ve just drawn and draw a second horizontal white vertical line parallel to this side.
Then, draw a second horizontal black line beneath one horizontal line. Make sure to not cross over the previous vertical white line in order to give the illusion that the line is running under it.
Finally, apply a layer of top coat, and you’re done!
5.) Shattered Glass Nails
What you’ll require:
Coat Base Coat (optional)
Black nail polish
Top coat
Iridescent cellophane
Scissors
Toothpick
Instructions:
Then, apply a thin top coat of basecoat onto your nail bed . Let it dry.
Apply black nail polish to create the base colour for the shattered glass nail. You can choose white nail polish if you wish to, but black nail polish will produce dramatic contrasts.
Get your cellophane with iridescence and cut it into pieces of random shapes.
Once you’ve finished cutting it, apply another coat of nail polish and place the iridescent pieces on your nail.
When the nail polish is wet, take the iridescent pieces randomly using the help of a toothpick that is wet. Make sure to leave space between each piece to create the effect of shattered glass.
Finally put on a few coatings of top coat on your nails. You’re done!
6.) Negative Space Cut-Out Triangle Nails
What you’ll require:
Polish for your nails of your choice
Top coat
Base Coat
Scotch tape
Instructions:
The first step is to paint your nails using a layer that is a base coat. This is essential since your nails will show through with this design.
Then, cut small pieces of scotch-tape, and then place it on the cuticle area, and then stick tape on the cuticle.
犀利士
Start applying your nail polish with the nail polish of your choice.
After you’ve applied manicure polish on your nails remove the scotch tape cautiously.
Finally, apply a coat of the top coat of polish in order to ensure it will last longer.
7.) Half-Moon Nails
You’ll need:
Gold nail polish is the half-moon shade
Burgundy nail polish is the most popular color
Top coat and base coat
Reinforcement labels
Instructions:
Before you apply anything on your nails apply one coat of base coat onto your nails.
Start applying your nails with the base colour that is a gold nail polish. If the shade is not enough, you can add another layer until the color is vibrant enough.
When the base colour is fully dried, apply reinforcement labels on your nails.
Paint your nails with bright burgundy nail polish.
Take off the labels that reinforce your nails after you’ve painted your nails with the top color.
Use topcoat to fix nail art and you’re all set to go!
Today’s fashion-related topic. I hope that you will find it interesting and informative.